Scrapbook Paper Pumpkin Centerpiece & Tutorial
I love decorating for the holidays. I just can’t shake that ‘festive’ itch. When the mantle, walls, and doors are properly decorated, and only then, I get to the kitchen table. Afterall, I wouldn’t want it to feel any holiday-envy. Imagine trying to eat dinner at a grumpy table that had been left-out. It might just decide to leave me out of dinner. I can’t have that. Every available surface should be decorated equally.
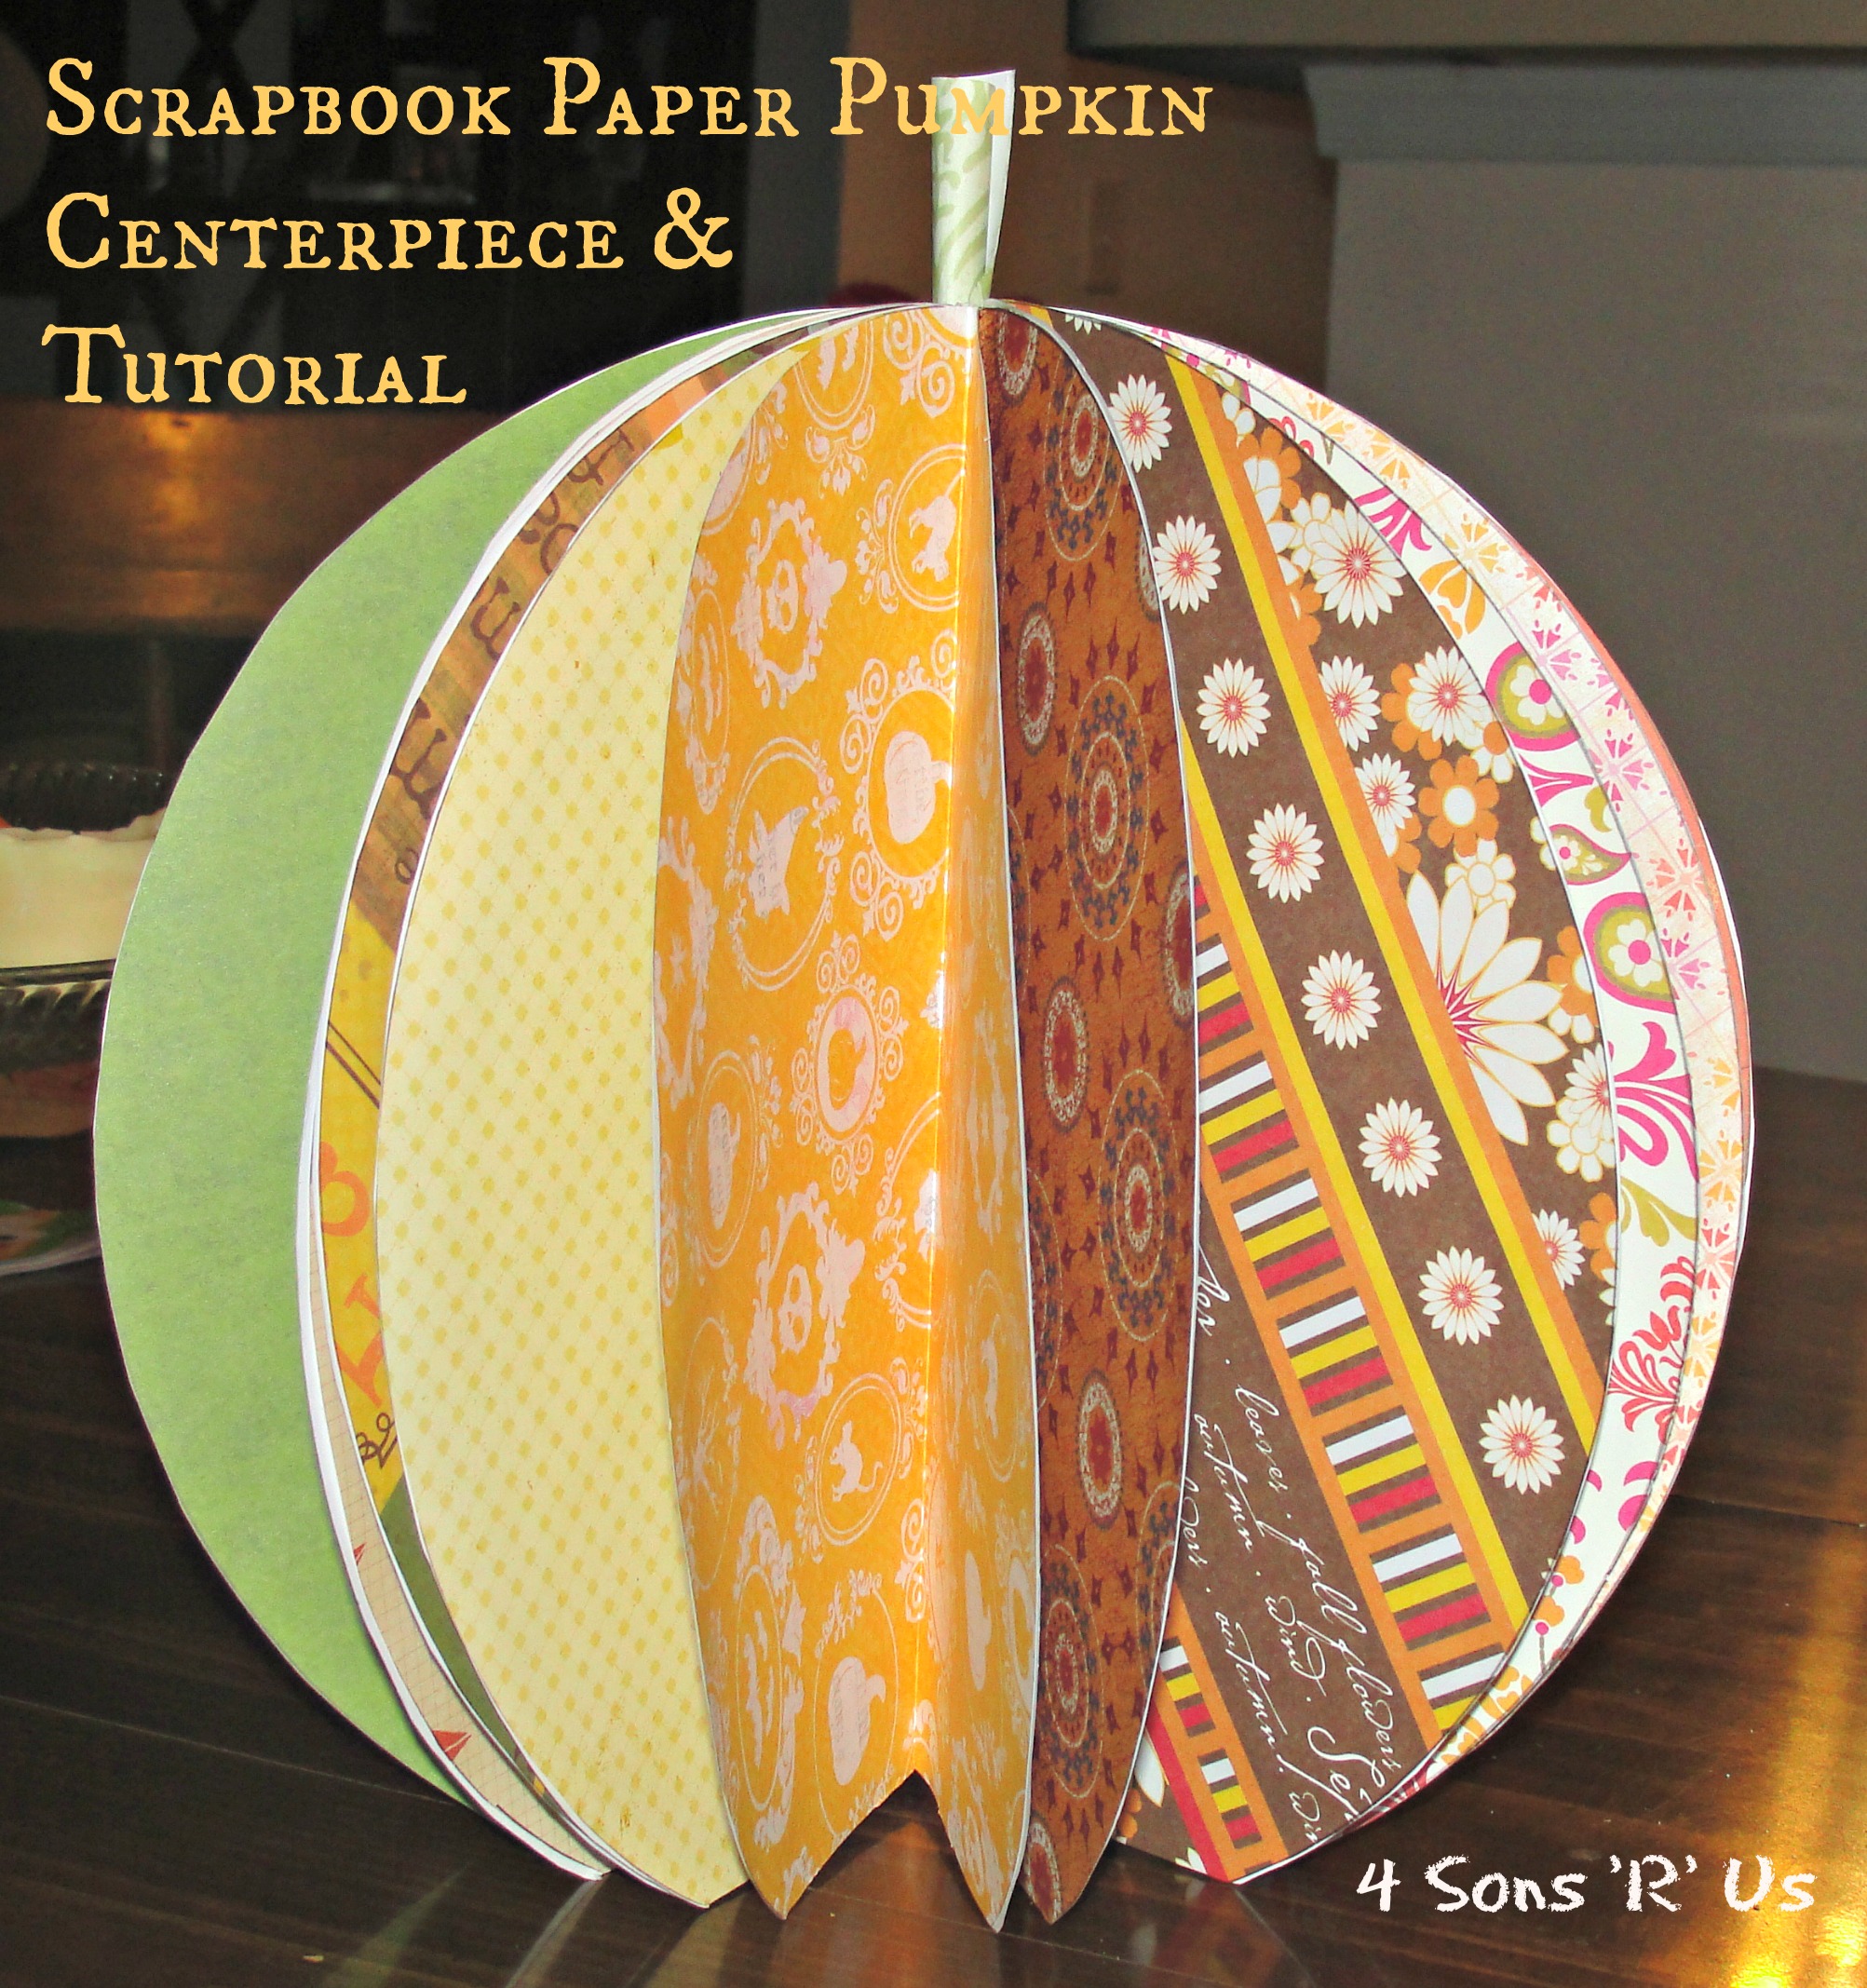
This year though, I wanted to do something a little different for our Thanksgiving centerpiece. I opted for these adorable scrapbook paper pumpkins. They’re cute, easy, and quick. Is your table looking lonely? Trying to get it up to snuff for Thanksgiving dinner? Begin creating your own fun, festive table-scape with a scrapbook paper pumpkin today.
Scrapbook Paper Pumpkin Centerpiece & Tutorial
- circular item to trace, I made two sizes of paper pumpkins and used a cake pan for the large one and a bowl for the smaller
- 8 or 16 pages of scrapbook paper, the large pumpkin only got one circle per page, the smaller got two
- scissors
- glue stick
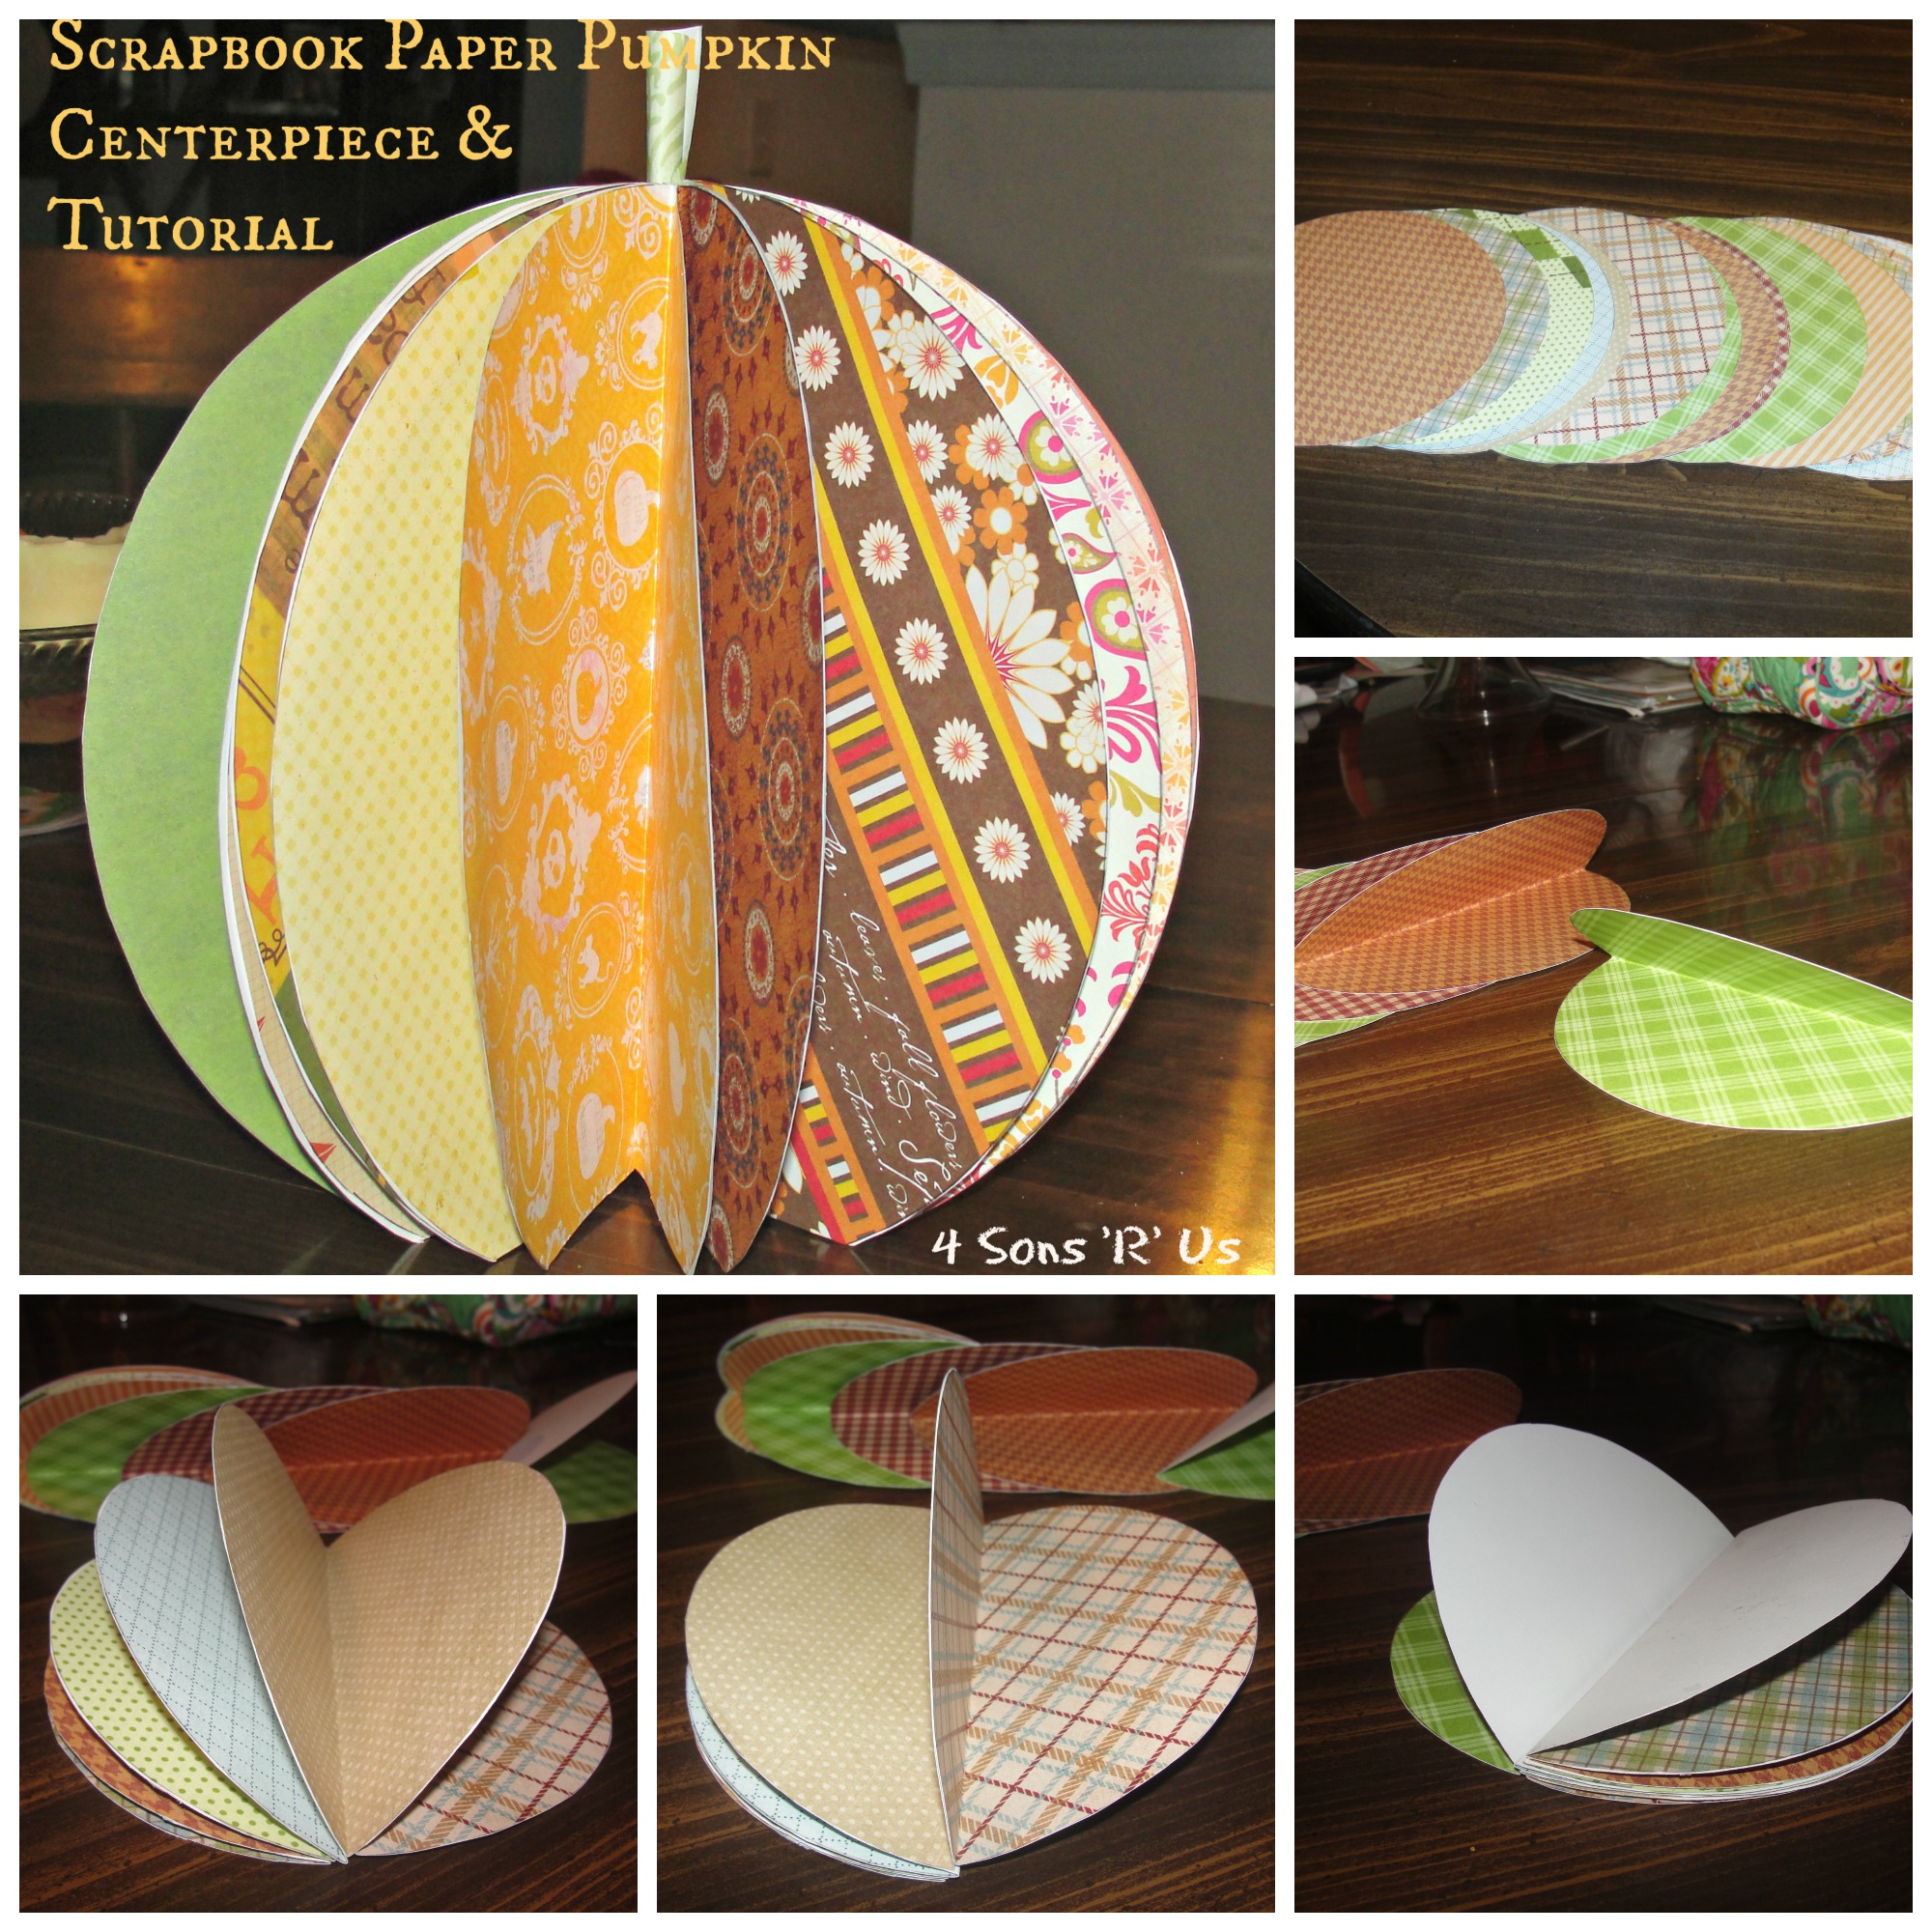
Before I give you the verbal tutorial here are some step-by-step photos for you as well.
Directions
- Trace and cut out 16 identical circles from scrapbook paper.
- Fold each circle in half with right sides together.
- Glue one side of the circle and place another circle patter on top of it until you have glued all the circles together.
- Once you have glued all the circles together, you will have one stack of folded circles. After the glue has dried, about 2-3 hours, unfold the circles and lay flat. You will have two sides that have not been glued. Glue them together so it creates an accordion.
- Decide which end of the pumpkin will be the bottom. Using an exacto knife or sharp scissors lay the pumpkin flat and cut a straight line about 1/4-1/2 inch from the bottom. This will enable it to ‘sit up’.
- Roll up a small piece of the scrap paper from where you cut out your circles to make a stem. Stick it into the tiny gap at the ‘top’ of your pumpkin.
Seriously, how cute are these little guys?!


Wonderful site you have here but I was wondering if you knew of
any community forums that cover the same topics talked about here?
I’d really like to be a part of online community where I
can get advice from other experienced individuals
that share the same interest. If you have any
recommendations, please let me know. Many thanks!